

Student Project Gallery for Learn Your CNC Academy

jonas Ögren
Made 2 trays to put keys and other things in. Used Odies oil on them

Bill Johnson
Funished a cornhole set

Mike Bernasconi
My latest project. Bobnie and Clyde an original crearwd in Aspire. Piece is approx. 38 x 22 including hand made floating frame made from canary wood. Carved in 1" B/ BB Baltic Birch 15 kayers. Finished with Odies Super Penetrating Oil.Thanks for looking!
My latest project. Bobnie and Clyde an original crearwd in Aspire. Piece is approx. 38 x 22 including hand made floating frame made from canary wood. Carved in 1" B/ BB Baltic Birch 15 kayers. Finished with Odies Super Penetrating Oil.Thanks for looking!
Jamal Alabbood
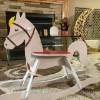
Creating a 3D horse sculpture with CNC technology and VCarve Pro is a thrilling journey that combines digital design with traditional craftsmanship. Spanish cedar's qualities make it an excellent choice for this project, resulting in a stunning piece of art that showcases the marriage of technology and woodworking expertise
Creating a 3D horse sculpture with CNC technology and VCarve Pro is a thrilling journey that combines digital design with traditional craftsmanship. Spanish cedar's qualities make it an excellent choice for this project, resulting in a stunning piece of art that showcases the marriage of technology and woodworking expertise

Steve Barnett
Oiled in the snuff boxes for a customer before delivery :) total so far 200 boxes.
SB
Steve Barnett
I made this for a firefighter friend in Canada, something different.
David Chamberlain
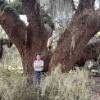
I installed some of my King Color Core signs test at Buffalo Creek Trail in Carrollton Georgia. I will be making about 20 directional signs with trail names and a large trail Map.
I installed some of my King Color Core signs test at Buffalo Creek Trail in Carrollton Georgia. I will be making about 20 directional signs with trail names and a large trail Map.
Kevin Wilkinson
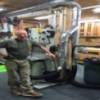
Just Finished this up before the season starts to hang on the front porch . It’s big 36x60.

jonas Ögren
Last Q&A some talked about dong pockets for pieces to carv or engrave. Here is an example on a pocket for biggee snuffboxes and a cut out for smaller ones. I am doing a project with several hundred snuffbixes for a tiktok influencer in sweden so i had to make a fast template to but the round boxes in on my laserbed.
Last Q&A some talked about dong pockets for pieces to carv or engrave. Here is an example on a pocket for biggee snuffboxes and a cut out for smaller ones. I am doing a project with several hundred snuffbixes for a tiktok influencer in sweden so i had to make a fast template to but the round boxes in on my laserbed.
PT
Phillip Taylor
First inlay on a charcuterie board. Cherry, Purple Heart, and Ambrosia Maple. I used a .125 and 60V. Custom order. I’m really digging this inlay challenge. Kyle, your recent inlay video was super helpful.
First inlay on a charcuterie board. Cherry, Purple Heart, and Ambrosia Maple. I used a .125 and 60V. Custom order. I’m really digging this inlay challenge. Kyle, your recent inlay video was super helpful.

Rob Mason
I finally finished Inlay with walnut, and canary wood. Oddies oil finish.
Jamal Alabbood
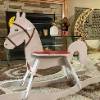
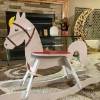
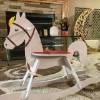
I love to share with you my last cration 3d horse , finished and stain for wall art
Jamal Alabbood
I carve it today , 9" size, I like the smoth I get from this idea using moulding toolpath with rough and finish, I change the size of the projects to fit with my material, thanks Kyle.
I carve it today , 9" size, I like the smoth I get from this idea using moulding toolpath with rough and finish, I change the size of the projects to fit with my material, thanks Kyle.

jonas Ögren
https://res.cloudinary.com/vibely2/image/upload/c_thumb,f_auto,g_face,h_160,w_160/v1/user-profile/xbbr57r6bjsshk08g2dc
RC
Rodney Carpenter
"Wooden ladle"

Bill Bertham
I think this turned out ok. Cherry wood and odis oil
Kevin Wilkinson
Had a customer that wanted butcher block countertops installed. I had a nice cut off so I told them I would make something for them, here’s what I made, inlays are cherrie, walnut and paduk, finished with odies oil. They loved it.
Had a customer that wanted butcher block countertops installed. I had a nice cut off so I told them I would make something for them, here’s what I made, inlays are cherrie, walnut and paduk, finished with odies oil. They loved it.

Lester Sak
This is a planter stand that I made for my daughter. She found a picture of what she wanted (the picture of the black stand with plants). I used scrap plywood that I had left over and sanded all of the edges to 220, coated them with joint compound (rather than buying edge banding) and sanded again once dry to get very smooth edges.
For the finish I used 2 coats of primer/surfacer sanded after each coat, 3 coats of white tinted lacquer and 4 coats of gloss clear lacquer. All of the straight cuts were made on the tablesaw, but the arcs were cut in 4 pieces each on the CNC and glued together using lap joints. The CNC was also used to cut pockets in the rectangular base pieces to glue and screw in the other pieces.
This is a planter stand that I made for my daughter. She found a picture of what she wanted (the picture of the black stand with plants). I used scrap plywood that I had left over and sanded all of the edges to 220, coated them with joint compound (rather than buying edge banding) and sanded again once dry to get very smooth edges.
For the finish I used 2 coats of primer/surfacer sanded after each coat, 3 coats of white tinted lacquer and 4 coats of gloss clear lacquer. All of the straight cuts were made on the tablesaw, but the arcs were cut in 4 pieces each on the CNC and glued together using lap joints. The CNC was also used to cut pockets in the rectangular base pieces to glue and screw in the other pieces.
RR
Rick Reimer
Using what I learned in lesson 148, 149 and 150 I created this nut dish. This is my prototype cut in popular (good thing made a mistake in one toolpath (oops). I actually acquired the nut cracker in 2017 and was going to turn a dish, but ... I wanted to make this look simple but it was complicated to program, learned a lot using the molding toolpath. now to find a chuck of wood and make the final
Using what I learned in lesson 148, 149 and 150 I created this nut dish. This is my prototype cut in popular (good thing made a mistake in one toolpath (oops). I actually acquired the nut cracker in 2017 and was going to turn a dish, but ... I wanted to make this look simple but it was complicated to program, learned a lot using the molding toolpath. now to find a chuck of wood and make the final
RS
Robert Sandstrom
Cracker and Cheese Boards I was talking t Kyle about on the Thursday Q&A - these are some I made in the last couple weeks. Handles are turned on the lathe but the boards are carved on my Laguna IQ CNC.
Cracker and Cheese Boards I was talking t Kyle about on the Thursday Q&A - these are some I made in the last couple weeks. Handles are turned on the lathe but the boards are carved on my Laguna IQ CNC.
RC
Rodney Carpenter
"Segmented bowl top"

jonas Ögren
Does any of you guys run a Etsy store?i have been testing it but Etsy is not big in Sweden yet. I have been testing to add a few files for digital download. Dont know if im doing it correct. Here is a link to my store if any of you guys can check and see if im doing it wrong. Totally new to it and zero sales:) https://www.etsy.com/se-en/listing/1534415415/jewlery-box-snuff-box-cnc-digital-file i just listed my 2latest files . One for a whiskey smoker and one for a jewlery box /snuff box. Please give me pointers
Does any of you guys run a Etsy store?i have been testing it but Etsy is not big in Sweden yet. I have been testing to add a few files for digital download. Dont know if im doing it correct. Here is a link to my store if any of you guys can check and see if im doing it wrong. Totally new to it and zero sales:) https://www.etsy.com/se-en/listing/1534415415/jewlery-box-snuff-box-cnc-digital-file i just listed my 2latest files . One for a whiskey smoker and one for a jewlery box /snuff box. Please give me pointers

Lester Sak
I've been playing around with the Magnate 796 thread mill. I was looking for the typical coarse mason jar thread but wasn't sure what thread pitch to use, so I made a few samples. I then decided to try UTS 7/8" and it worked out although I'd like to better understand the relationship between the Max Depth, Thread Length and Pitch. Has anyone else tried this bit yet?
I've been playing around with the Magnate 796 thread mill. I was looking for the typical coarse mason jar thread but wasn't sure what thread pitch to use, so I made a few samples. I then decided to try UTS 7/8" and it worked out although I'd like to better understand the relationship between the Max Depth, Thread Length and Pitch. Has anyone else tried this bit yet?
GF
Greg Fera
Kyle, Here is a picture of a Bocce Score board I made for my Neighbor. This is a bowling game that originated in Ancient Rome. The ball closest to the Pallino (small ball) scores the point.
Greg
Kyle, Here is a picture of a Bocce Score board I made for my Neighbor. This is a bowling game that originated in Ancient Rome. The ball closest to the Pallino (small ball) scores the point.
Greg
Jamal Alabbood
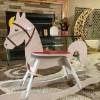
This is from my customer sent to me yesterday and he was so happy with this horse
RR
Rick Reimer
My first chip & dip tray (Prototype) Came out OK but there are some changes I plan to make for the final

Mike Bernasconi
New carve today 23 x 18 Old Man in the Mountains. 1" B/BB Baltic birch. From photo I took

Brandon Bevan
@AfterThoughtBevanCreations
I like both color choices but not sure which one I like the most. Still a lot of fun making theses and not sure i would have been able to do with out Kyle’s classes. There was a lot of clean up work and adding vectors to tweak this design to make it work how I wanted
I like both color choices but not sure which one I like the most. Still a lot of fun making theses and not sure i would have been able to do with out Kyle’s classes. There was a lot of clean up work and adding vectors to tweak this design to make it work how I wanted

Lester Sak
I carved another military plaque in Sapele. I needed to redraw all of the vectors for the eagle emblem, they were a mess from the Trace Bitmap function. But every time I need to do it, I learn some new tricks to make it faster.
I carved another military plaque in Sapele. I needed to redraw all of the vectors for the eagle emblem, they were a mess from the Trace Bitmap function. But every time I need to do it, I learn some new tricks to make it faster.

jonas Ögren
Laserd my sons drawings on to wood. I traced them with Aspire. Check his drawings on his instagram @hinotorimanga

Dave Sanek
Good evening Kyle. Last week you helped me to add some plans for a toy car into Vectric so I could cut the parts on the CNC. All went well and I have completed the Car portion of the plan and will now start the accompanying camper trailer. I said I would post photos of the finished plan. Since this was a painted project, the main material is 1/4" and 3/4" mdf and 1/8" basswood for some of the trim pieces.
Good evening Kyle. Last week you helped me to add some plans for a toy car into Vectric so I could cut the parts on the CNC. All went well and I have completed the Car portion of the plan and will now start the accompanying camper trailer. I said I would post photos of the finished plan. Since this was a painted project, the main material is 1/4" and 3/4" mdf and 1/8" basswood for some of the trim pieces.
RR
Rick Reimer
My first attempt of making a cribbage board, I've always waned to make one, we have talked about the best bits to use (boring bits from tools today) during our meetups and I finally bit the bullet and got one (during the fathers day sale s0 I got a free bit) and this is what I made.
My first attempt of making a cribbage board, I've always waned to make one, we have talked about the best bits to use (boring bits from tools today) during our meetups and I finally bit the bullet and got one (during the fathers day sale s0 I got a free bit) and this is what I made.
James Ryan
So, to practice with my (barely competent) SketchUp & 3Ding skills, this is what I worked on will babysitting. Behold the ....GoFor Helper!!!
Doing the midnight shift, the amount of coffee & diet Pepsi that is required staggering!
Only dry fitted together at this point but it already has two upgrades coming.
So, to practice with my (barely competent) SketchUp & 3Ding skills, this is what I worked on will babysitting. Behold the ....GoFor Helper!!!
Doing the midnight shift, the amount of coffee & diet Pepsi that is required staggering!
Only dry fitted together at this point but it already has two upgrades coming.

Tony Duderewicz
Playing around with scallop edges on different shapes. Thanks Kyle for the lesson today.

Tony Duderewicz
Did a retirement edge lit acrylic sign. 6" x 9" using a diamond drag bit only, on cast acrylic. Depth of pressure was .01 and stepover of .004 using a quick engrave toolpath.
Did a retirement edge lit acrylic sign. 6" x 9" using a diamond drag bit only, on cast acrylic. Depth of pressure was .01 and stepover of .004 using a quick engrave toolpath.

Lester Sak
Finished a military plaque that I received an order for. Carved in sapele.

Lester Sak
A couple of birdhouses I just completed for Father's Day gifts. Made from sapele sprayed with spar urethane.

Lester Sak
Here's a simple compass rose I carved in torrified poplar, finished with black paint and water-based lacquer.

Lester Sak
Started making a clock using spalted wood from a Sweet Gum tree limb that fell in my yard a few years ago. Used tabletop epoxy mixed with blue mica powder. Need to carve the numbers and mount the clock mechanism next.
Started making a clock using spalted wood from a Sweet Gum tree limb that fell in my yard a few years ago. Used tabletop epoxy mixed with blue mica powder. Need to carve the numbers and mount the clock mechanism next.
MB
Mike Bernasconi
I just finished this carvine on my machine. This design I created in Aspire. It is 1" Marine grade mahogany plywood about 10" in diameter. Rough with IDC Hog, finish with Amana 1/8 and 1/16 tapered ball nose.
I just finished this carvine on my machine. This design I created in Aspire. It is 1" Marine grade mahogany plywood about 10" in diameter. Rough with IDC Hog, finish with Amana 1/8 and 1/16 tapered ball nose.
James Ryan
So back to trying to get some contrast on the HDPE jigs. Bottom one is a Water & Acrylic paint mix. Surprisingly, it did highlight the font & is sticking to it. Middle one is just Rust-Oleum rattle can on the HDPE. Better but not something I would put my name on or attempt to sell. Just sprayed on and sanded off. The little spots have to be taken off with a scraper & that's not going to happen with the amount of jigs she wants. Third times the (somewhat) charm! This is actually the PVC Trim Board from the big box store, which was the original material that I was using at the start of the project. Had a sit down with the client, showed the samples and she decided to go with the PVC for this jig & use HDPE for the others as the other jigs only have an I.D. number on them.
Top one was cut with a 60VB, 100 IPM, and Ormasked. The discoloration was from me being impatient for the NAIL POLISH to dry (I'm a sucker for a Wet Paint sign!). Going to test a 30VB and also order up some dual color plastics for the next test.
Ultimately trying to get to a mfg product that can contrast any text, allow QR code to be carved into it, is high strength and water proof.
So back to trying to get some contrast on the HDPE jigs. Bottom one is a Water & Acrylic paint mix. Surprisingly, it did highlight the font & is sticking to it. Middle one is just Rust-Oleum rattle can on the HDPE. Better but not something I would put my name on or attempt to sell. Just sprayed on and sanded off. The little spots have to be taken off with a scraper & that's not going to happen with the amount of jigs she wants. Third times the (somewhat) charm! This is actually the PVC Trim Board from the big box store, which was the original material that I was using at the start of the project. Had a sit down with the client, showed the samples and she decided to go with the PVC for this jig & use HDPE for the others as the other jigs only have an I.D. number on them.
Top one was cut with a 60VB, 100 IPM, and Ormasked. The discoloration was from me being impatient for the NAIL POLISH to dry (I'm a sucker for a Wet Paint sign!). Going to test a 30VB and also order up some dual color plastics for the next test.
Ultimately trying to get to a mfg product that can contrast any text, allow QR code to be carved into it, is high strength and water proof.

Lars Coleman
Finished the corn hole boards from lesson 101.
I had to add tabs to the internal cut-outs, resize and add fillets to the slots on the legs, but it cut pretty nice otherwise. I really didn't need to adjust anything else since the plywood thickness was already pretty close.
Finished the corn hole boards from lesson 101.
I had to add tabs to the internal cut-outs, resize and add fillets to the slots on the legs, but it cut pretty nice otherwise. I really didn't need to adjust anything else since the plywood thickness was already pretty close.
RC
Rodney Carpenter
"Birdhouse"
Jamal Alabbood
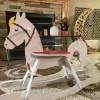
The completed cigar tray became a stunning showcase of craftsmanship, melding the elegance of cherry wood, the allure of maple, and the rustic appeal of pine. It exuded a timeless charm that would fit effortlessly into any environment, be it a classic study, a cozy lounge, or a modern den.
The completed cigar tray became a stunning showcase of craftsmanship, melding the elegance of cherry wood, the allure of maple, and the rustic appeal of pine. It exuded a timeless charm that would fit effortlessly into any environment, be it a classic study, a cozy lounge, or a modern den.

Alfred Floyd
Here it is!!This was a challenging project. The rope crown molding as well as the carved front were opportunities to expand knowledge with Aspire. The rope molding also created a challenge with tiling. Most importantly, the "boss" is happy.
Here it is!!This was a challenging project. The rope crown molding as well as the carved front were opportunities to expand knowledge with Aspire. The rope molding also created a challenge with tiling. Most importantly, the "boss" is happy.
RG
Ron Grossl
This is probably not very complicated for most of you, but since I haven't done a lot of CNC work, it was a bit of a challenge for me and I'm glad its done. It is a bench that goes in a sauna and made from teak. First off, it was too long for my cnc machine, so I had to do the indexing to move it. And I had to machine a channel for the square channels on the wall to fit into. They are in the back and go through most of the width of the bench. The only to do this was make the bench in two parts and glue them together. This made it a two sided project which I have done before, but with the length being longer than the machine bed, it made me scratch my head a bit. And finally, I used a two part epoxy finish that I had never used before. I'm just glad its done and the guy I made it for is very happy with it. I just hope the steam doesn't tear it apart. Tried to talk him out of if, but this is what he wanted.
This is probably not very complicated for most of you, but since I haven't done a lot of CNC work, it was a bit of a challenge for me and I'm glad its done. It is a bench that goes in a sauna and made from teak. First off, it was too long for my cnc machine, so I had to do the indexing to move it. And I had to machine a channel for the square channels on the wall to fit into. They are in the back and go through most of the width of the bench. The only to do this was make the bench in two parts and glue them together. This made it a two sided project which I have done before, but with the length being longer than the machine bed, it made me scratch my head a bit. And finally, I used a two part epoxy finish that I had never used before. I'm just glad its done and the guy I made it for is very happy with it. I just hope the steam doesn't tear it apart. Tried to talk him out of if, but this is what he wanted.

Cliff Neal
Hold Down Multiple Parts in small area with biscuit blocks. These are also double sided parts (use pin alignment) biscuit blocks are 1/16 to 1/8 short of gap between parts to alow some adjustment and biscuit is below center in block so down force can be appto parts. Works great. And no tool interference on parts as long as you can place biscuit cut in a safe area. The jig board is made for each type of part needed. Can use both sides of jig board for different parts
Hold Down Multiple Parts in small area with biscuit blocks. These are also double sided parts (use pin alignment) biscuit blocks are 1/16 to 1/8 short of gap between parts to alow some adjustment and biscuit is below center in block so down force can be appto parts. Works great. And no tool interference on parts as long as you can place biscuit cut in a safe area. The jig board is made for each type of part needed. Can use both sides of jig board for different parts
GF
Greg Fera
Just completed two Corian projects with epoxy inlays.
RL
Robert Lewis
Hey Kyle, or anyone else who knows. I am creating a cutting board and want to create sloped finger reliefs from a 3d object. Here is what I am after. Although I came close as you can see in the image, I am running into some issues. I have really had to monkey around with the settings and tool path settings that I know are not the best or most efficient way to do it. Also not the most accurate way. I really want to learn the correct way. Thanks for any help!!
Hey Kyle, or anyone else who knows. I am creating a cutting board and want to create sloped finger reliefs from a 3d object. Here is what I am after. Although I came close as you can see in the image, I am running into some issues. I have really had to monkey around with the settings and tool path settings that I know are not the best or most efficient way to do it. Also not the most accurate way. I really want to learn the correct way. Thanks for any help!!
MP
Michael Pontarelli
made this charcuterie board for a friend. I used entropy resins for the epoxy. I had my cnc mch built with an overhang so I can trench out the side of the boards.
made this charcuterie board for a friend. I used entropy resins for the epoxy. I had my cnc mch built with an overhang so I can trench out the side of the boards.
GC
Gerard Cochrane
Same birdhouse up in a tree behind our house
RC
Rodney Carpenter
bird house_dog design,
GC
Gerard Cochrane
Dug up an old. Project for practice for live Training

Tony Duderewicz
I did this carving of Mother and Child for Mothers Day. The material is white corian which is is solid surface material and I glue it on a piece of stained plywood.
I did this carving of Mother and Child for Mothers Day. The material is white corian which is is solid surface material and I glue it on a piece of stained plywood.

Lars Coleman
I made this bird house for my Mom for mothers day. I used a hybrid laser and CNC design I came up with using the vectric 3d models from design and make fairy garden files.
I made this bird house for my Mom for mothers day. I used a hybrid laser and CNC design I came up with using the vectric 3d models from design and make fairy garden files.
AS
Allan Smith
I've been asked quite a few times to make this for them. It's an inch thick. My next attempt is to make it as a box and put chocolates in it. Just imagine how a woman would react if a boyfriend or husband gave it as a gift for valentines day or mothers day.
I've been asked quite a few times to make this for them. It's an inch thick. My next attempt is to make it as a box and put chocolates in it. Just imagine how a woman would react if a boyfriend or husband gave it as a gift for valentines day or mothers day.
GC
Gerard Cochrane
I did another grill scraper. This type I used oak. I had to make it a little smaller than our plan. I used a laser for the first time on a project. Didn’t have much clipart so I used what I had.
I did another grill scraper. This type I used oak. I had to make it a little smaller than our plan. I used a laser for the first time on a project. Didn’t have much clipart so I used what I had.
RC
Rodney Carpenter
Made this bouquet of flowers for my wife for Mother's Day. Cherry wood with shellac and poly for the finishing touch.
RR
Rick Reimer
This is the first Mothers day that I have had a Mother to celebrate in some time. Both my Daughter and My Niece (twins) are new mothers for the first time this year. I made the picture frame cross from live lesson #140 for each (only one shown). This is the first project made on a new (to me) CNC. I've been working with CNC's and V Care Pro for a few years but Recently took on a project to rebuild a CNC - stated with a frame acquired at a auction then replaced motors, control box, sensors etc.
This is the first Mothers day that I have had a Mother to celebrate in some time. Both my Daughter and My Niece (twins) are new mothers for the first time this year. I made the picture frame cross from live lesson #140 for each (only one shown). This is the first project made on a new (to me) CNC. I've been working with CNC's and V Care Pro for a few years but Recently took on a project to rebuild a CNC - stated with a frame acquired at a auction then replaced motors, control box, sensors etc.

Alfred Floyd
I completed this challenge!

Steve Gronsky
Custom sign made with VCarve Pro with vector cleanup help from Kyle.
K
Kris W.
Cutting board made with VCarve Pro with help from Live Vectric Group Training Lesson #24.

Christian Bergqvist
https://www.alberi.se/
Save some money 😅

Robert Sandstrom
Recently completed this flag and eagle combination to enter into the Design in Wood competition at the Del Mar Fair in Del Mar, CA. Used Broinwood technique for inlaying stars and carved Design and Make Eagle to mount on the flag.
Recently completed this flag and eagle combination to enter into the Design in Wood competition at the Del Mar Fair in Del Mar, CA. Used Broinwood technique for inlaying stars and carved Design and Make Eagle to mount on the flag.
GC
Gerard Cochrane
I did this bbq scraper today. I made it out of pine for practice. I did not have an up cut 1/4 BN but I should have one in a week. I plan on using a laser to make some markings on it
I did this bbq scraper today. I made it out of pine for practice. I did not have an up cut 1/4 BN but I should have one in a week. I plan on using a laser to make some markings on it

John Pembleton
Great file

Kevin Guynn
have been turning pens for some time and have decided to start making resin pens. I looked at the cost of the silicone molds and decided to create my own silicone molds. Here is a file I plan to cut on my CNC to create the cavity to pour the silicone in so I can make the silicone mold. I plan to make one, and of all goes well, start to sell the molds online.
If you want the file, let me know. Each of these will create four .8 x .8 x 6" cavities with a .375 wall and .5" bottom when the silicone is poured into this mold.
As always, please check to ensure the toolpath is appropriate for your machine.
have been turning pens for some time and have decided to start making resin pens. I looked at the cost of the silicone molds and decided to create my own silicone molds. Here is a file I plan to cut on my CNC to create the cavity to pour the silicone in so I can make the silicone mold. I plan to make one, and of all goes well, start to sell the molds online.
If you want the file, let me know. Each of these will create four .8 x .8 x 6" cavities with a .375 wall and .5" bottom when the silicone is poured into this mold.
As always, please check to ensure the toolpath is appropriate for your machine.

Kevin Guynn
https://woodarchivist.com/2649-lathe-steady-rest-plans/
A few days ago, I watched Kyle's lesson on Woodworking jigs and decided to take a shot at
creating a Lathe Steady Rest. I found a design on-lie, but it does not have a name associated
with the file so I cannot give credit to the person. I did add the link so you can see the photo
I used to create the project in VCarve Pro11.5xx. I hoped to be able to upload the file itself, but
all I could add was an svg file. If you want the file and my notes, just reach out at bandman57@oh.rr.com and I will send it to you. In the file is one possible option for the wheels from Amazon.
Kevin
https://woodarchivist.com/2649-lathe-steady-rest-plans/
A few days ago, I watched Kyle's lesson on Woodworking jigs and decided to take a shot at
creating a Lathe Steady Rest. I found a design on-lie, but it does not have a name associated
with the file so I cannot give credit to the person. I did add the link so you can see the photo
I used to create the project in VCarve Pro11.5xx. I hoped to be able to upload the file itself, but
all I could add was an svg file. If you want the file and my notes, just reach out at bandman57@oh.rr.com and I will send it to you. In the file is one possible option for the wheels from Amazon.
Kevin

Michael Jameson
My best so far on my Axiom AR8 timber is Brown pine 600mm x 300 Apparently from an old power station Design & make file 12mm roughing 1/ 8 TBN finish it probably could have done with a 1/16 to finish it off but I was trying to keep the machining time down about six and a half hours. A few more like this and i may be able to afford a down payment on Aspire cheers all
My best so far on my Axiom AR8 timber is Brown pine 600mm x 300 Apparently from an old power station Design & make file 12mm roughing 1/ 8 TBN finish it probably could have done with a 1/16 to finish it off but I was trying to keep the machining time down about six and a half hours. A few more like this and i may be able to afford a down payment on Aspire cheers all

John Dolleslager
Made this pizza peel out of maple and Bolivian Rosewood. Now the question is do I put a finish on it, if so what? My first thought is just cutting board oil.
Made this pizza peel out of maple and Bolivian Rosewood. Now the question is do I put a finish on it, if so what? My first thought is just cutting board oil.
GC
Gerard Cochrane
Hi, made with Sketch and Vcarve pro. Could of made with just Vcarve but wanted to try some of the skills we learned in Sketchup recently. I really don’t have anything else to enter made with Vcarve. I made both dado’s on the cnc - Longmill MK2. I did not paint it as I like the wood look.
Hi, made with Sketch and Vcarve pro. Could of made with just Vcarve but wanted to try some of the skills we learned in Sketchup recently. I really don’t have anything else to enter made with Vcarve. I made both dado’s on the cnc - Longmill MK2. I did not paint it as I like the wood look.
James Ryan
Morning all, this is what has been keeping me busy. These are part of the large order I received. 15 done and 601 to completion! Not as cool as what everyone else has been doing, but it's another step closer to being able to buy Aspire.
Morning all, this is what has been keeping me busy. These are part of the large order I received. 15 done and 601 to completion! Not as cool as what everyone else has been doing, but it's another step closer to being able to buy Aspire.

Lester Sak
I finished 6 signs that I made for Clusterbusters, an organization devoted to funding research for cluster headaches (aka "Suicide Headaches").
Thanks Kyle for confirming how to go about creating the pockets for the rainbow where the stripes meet the images on either side. I did this as a favor for a friend who works with the organization but I let him know before I started that I wouldn't paint the carved areas, so I used hard maple to give as much contrast to the paint as possible. I didn't think Oramask would have worked well due to some of the detailed areas, and I didn't have time to hand paint 6 signs, but my buddy was fine with that.
I finished 6 signs that I made for Clusterbusters, an organization devoted to funding research for cluster headaches (aka "Suicide Headaches").
Thanks Kyle for confirming how to go about creating the pockets for the rainbow where the stripes meet the images on either side. I did this as a favor for a friend who works with the organization but I let him know before I started that I wouldn't paint the carved areas, so I used hard maple to give as much contrast to the paint as possible. I didn't think Oramask would have worked well due to some of the detailed areas, and I didn't have time to hand paint 6 signs, but my buddy was fine with that.
JS
Joseph Slawinsky
Couple of cribbage boards I made...

Byron Williams
Made this out of MDF for a friends niece wedding. 1st time doing a tiling project.

Mike Bernasconi
Latest from a picture I took of the OLD MAN IN THE MOUNTAINS in New Hampshire before he fell off the mountain, 1 inch baltic birch. Now to figure out how to finish
Latest from a picture I took of the OLD MAN IN THE MOUNTAINS in New Hampshire before he fell off the mountain, 1 inch baltic birch. Now to figure out how to finish

Adam Schultz
Army Engineer Castle 24” x 36” x 3” Pine/Oak combination.
1/4” Downcut Roughing, 1/16” Ballnose Finishing.
Stepcraft M1000 w/ ATC
All hand stained.
This thing was massive weighing in around 20lbs by far my biggest challenge.
Would not have been able to achieve this without the help of Kyle and this course. Thanks again Sir!
Army Engineer Castle 24” x 36” x 3” Pine/Oak combination.
1/4” Downcut Roughing, 1/16” Ballnose Finishing.
Stepcraft M1000 w/ ATC
All hand stained.
This thing was massive weighing in around 20lbs by far my biggest challenge.
Would not have been able to achieve this without the help of Kyle and this course. Thanks again Sir!

Tony Duderewicz
Just did a Buffalo Sabres cribbage board. Took a couple days to figure it out and I'm happy the way it turned out. It's 13" x 7-1/2" x 1-3/8" thick piece of maple.
Just did a Buffalo Sabres cribbage board. Took a couple days to figure it out and I'm happy the way it turned out. It's 13" x 7-1/2" x 1-3/8" thick piece of maple.

Alfred Floyd
A couple of weeks ago, Kyle did a session on creating a carving mallet in Aspire using the 4th axis. After discovering several things that did not work This one made it to completion. The truly impressive thing about this project is the textured handle. This one is made of cherry. Since I have a lathe, I did the sanding and cutout there.
A couple of weeks ago, Kyle did a session on creating a carving mallet in Aspire using the 4th axis. After discovering several things that did not work This one made it to completion. The truly impressive thing about this project is the textured handle. This one is made of cherry. Since I have a lathe, I did the sanding and cutout there.

Tony Duderewicz
Here is an adjustable lamp I made out of cherry, did the nuts and bolts according to the video Kyle posted about doing thread milling, thank you Kyle. I downloaded it from the vectric site and made it to my specs. I showed this and how I did it at our cnc club at Rockler in Buffalo, NY
Here is an adjustable lamp I made out of cherry, did the nuts and bolts according to the video Kyle posted about doing thread milling, thank you Kyle. I downloaded it from the vectric site and made it to my specs. I showed this and how I did it at our cnc club at Rockler in Buffalo, NY
Rob Hadwen
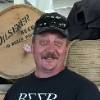
hi all just wanna say thanks to Kyle his videos are great and show my first "PROUD PROJECT" lol

Lester Sak
These are pics of the sign I mentioned in today's Q&A meeting where I used joint compound as masking material for painting. The sign is the poem "Desiderata" which I did in different fonts and sizes, some of them pretty small. Using Oramask would have been tedious if not impossible to use due to all of the weeding afterwards. And I didn't want to just paint and sand because the smaller fonts were very shallow, and I was afraid of sanding off detail. Using the joint compound, I set my cut depth a little deeper and then just needed to sand off the dried plaster. Marsh Aerosol Stencil Ink works well for this. Just another technique that can be used :)
I found that Kajabi doesn't put pictures in the order they're uploaded in, but you get the idea
These are pics of the sign I mentioned in today's Q&A meeting where I used joint compound as masking material for painting. The sign is the poem "Desiderata" which I did in different fonts and sizes, some of them pretty small. Using Oramask would have been tedious if not impossible to use due to all of the weeding afterwards. And I didn't want to just paint and sand because the smaller fonts were very shallow, and I was afraid of sanding off detail. Using the joint compound, I set my cut depth a little deeper and then just needed to sand off the dried plaster. Marsh Aerosol Stencil Ink works well for this. Just another technique that can be used :)
I found that Kajabi doesn't put pictures in the order they're uploaded in, but you get the idea
JM
Jack Mester
Friend of mine wanted me to use his tree trunk. So I came up with a design for him using Aspire. I found out trying to locate and register an irregular shape from drawing to the cnc router and them matching was a lot more difficult than anticipated. The carving had to follow the outside live edge and leave a 3/4" order. It wasn't perfect but didn't turn out to bad. I am wondering is there an easy way to register irregular shapes when you cant cutout the outside edge?
Friend of mine wanted me to use his tree trunk. So I came up with a design for him using Aspire. I found out trying to locate and register an irregular shape from drawing to the cnc router and them matching was a lot more difficult than anticipated. The carving had to follow the outside live edge and leave a 3/4" order. It wasn't perfect but didn't turn out to bad. I am wondering is there an easy way to register irregular shapes when you cant cutout the outside edge?

Tony Duderewicz
Did this stacked text sign in aspire using only a 1/8" tapered ball nose bit. After I laid out my text, I went to the modeling tab and created 3D models of the text. Bottom text is .15" high and the top letters are .25" high. The top letters are merged with the bottom letters, I also put a border around it for a frame. I than went and did the 3D finishing toolpath only by clicking on the border vector using the 1/8" tapered ball nose using a raster angle of zero, that's it. Very easy to do
Did this stacked text sign in aspire using only a 1/8" tapered ball nose bit. After I laid out my text, I went to the modeling tab and created 3D models of the text. Bottom text is .15" high and the top letters are .25" high. The top letters are merged with the bottom letters, I also put a border around it for a frame. I than went and did the 3D finishing toolpath only by clicking on the border vector using the 1/8" tapered ball nose using a raster angle of zero, that's it. Very easy to do

Lester Sak
I'm renovating a room in my house and decided to design the electrical plates for the switches and outlets. These are made from Sapele and finished with Rubio Monocoat. There's a nick in the bottom of one the outlet plates which happened when the tabs didn't hold. I could recarve it, but it'll be low on the wall behind a cabinet so it's done, lol.
I'm renovating a room in my house and decided to design the electrical plates for the switches and outlets. These are made from Sapele and finished with Rubio Monocoat. There's a nick in the bottom of one the outlet plates which happened when the tabs didn't hold. I could recarve it, but it'll be low on the wall behind a cabinet so it's done, lol.

John Pembleton
So hesitant to learn more stuff but I took a magazine cabinet and modified in SketchUp to be a shoe cabinet due to our recent training. The wife loves it! Thanks Kyle.
So hesitant to learn more stuff but I took a magazine cabinet and modified in SketchUp to be a shoe cabinet due to our recent training. The wife loves it! Thanks Kyle.
Scott Chausee
Couple more epoxy inlay Family Crests
EB
Eric Bardell
I always wonder if I could make my own branding iron.This is what it looks like.I used 1 1/2" brass 5/8"thick.4
James Ryan
All, just a follow up on the work that Zeon Graphics saved my behind out. (5) files that I had been messing with for weeks & months with limited success. Finally bit the bullet & sent them to Zeon Graphic as just the JPG files. Zeon (Ashley Williams) looked them over, quoted a price that I could live with turn-around in 24-48 hours. Once I approved the initial conversion, shed baked them and emailed them back. I received the converted JPGs back in (6) different file formats. Attached are some of the conversions she did. Hands down, I recommend Zeon Graphics when you don't have the time, experience, or patients to do it yourself.
All, just a follow up on the work that Zeon Graphics saved my behind out. (5) files that I had been messing with for weeks & months with limited success. Finally bit the bullet & sent them to Zeon Graphic as just the JPG files. Zeon (Ashley Williams) looked them over, quoted a price that I could live with turn-around in 24-48 hours. Once I approved the initial conversion, shed baked them and emailed them back. I received the converted JPGs back in (6) different file formats. Attached are some of the conversions she did. Hands down, I recommend Zeon Graphics when you don't have the time, experience, or patients to do it yourself.

John Pembleton
Well it's finally done. I hired Kyle for some one-on-one with some areas I was having difficulty with this mule chest it was absolutely worth it to spend the time with him one-on-one to work out a few bugs that I was experiencing, here's the end result there was some hand chisel work but most of all was cut out on the CNC.
Well it's finally done. I hired Kyle for some one-on-one with some areas I was having difficulty with this mule chest it was absolutely worth it to spend the time with him one-on-one to work out a few bugs that I was experiencing, here's the end result there was some hand chisel work but most of all was cut out on the CNC.
Scott Chausee
Live edge Cherry with epoxy fill letters and walnut bear inlay.
James Ryan
All, for anyone that is thinking about making the rotating bookshelf project, this is the Lazy Susan information that I put together for the one I'll be attempting. It contains all of the Purchasing information, cleaned up MFG's DXF, Mfg's Engineering Drawing, and a Design that can be incorporated into the design. It does not contain tool paths. https://drive.google.com/file/d/1jkZvlyJzNhlbDg1n9X5M_6fg5rmITVcm/view?usp=sharing
All, for anyone that is thinking about making the rotating bookshelf project, this is the Lazy Susan information that I put together for the one I'll be attempting. It contains all of the Purchasing information, cleaned up MFG's DXF, Mfg's Engineering Drawing, and a Design that can be incorporated into the design. It does not contain tool paths. https://drive.google.com/file/d/1jkZvlyJzNhlbDg1n9X5M_6fg5rmITVcm/view?usp=sharing

Tony Duderewicz
Did a 12" Alligator and carved an alligator on a piece of red oak with a pecan stain and burnt umber glaze.. The gator on the oak is from https://www.thingiverse.com/thing:3344930
Did a 12" Alligator and carved an alligator on a piece of red oak with a pecan stain and burnt umber glaze.. The gator on the oak is from https://www.thingiverse.com/thing:3344930

Dan Linsky
A pretty simple address sign for an AirBnB. Epoxy fill on heat-treated poplar and sprayed with spar varnish.

Tony Duderewicz
I did this carving because a fireman died fighting a fire with an explosion yesterday in Buffalo, NY https://www.youtube.com/watch?v=UNlZErfTVNk&ab_channel=NBCNews
I did this carving because a fireman died fighting a fire with an explosion yesterday in Buffalo, NY https://www.youtube.com/watch?v=UNlZErfTVNk&ab_channel=NBCNews
RB
Richard Boehlke
EGA carved from 8/4 curly maple for a good friend.
Jamal Alabbood
Carving a 3D horse using a CNC machine and finishing it with a stain can be a great way to create a beautiful and unique piece of art. With the help of VCarve Pro software, importing a file from clipart and adding a base can be easily done.
Firstly, it's essential to have a good 3D model of the horse. There are many free and paid options available online that can be used. Once you have the file, you can import it into VCarve Pro software.
After importing the file, you can start editing it according to your requirements. The software provides various tools to make changes to the model. For example, you can resize it, add or remove details, and modify its shape.
Once you're happy with the model, you can generate the toolpath. A toolpath is a set of instructions that tell the CNC machine how to cut the material to create the 3D model. VCarve Pro provides an easy-to-use toolpath generator that lets you choose the cutting tools and speed for different parts of the model.
After generating the toolpath, you can start the CNC machine and load the material. The machine will start carving the horse according to the toolpath you've created. The carving process may take a few hours depending on the complexity of the model.
Once the carving is complete, it's time to apply the stain to the horse. Staining the horse can bring out the details and add depth to the model. Choose a color that complements the horse's design and use a brush to apply the stain evenly.
Finally, you can add a base to the horse to give it a stable and attractive display. You can use wood, metal, or any other material to create the base. Design it in a way that complements the horse's design and provides adequate support.
In conclusion, carving a 3D horse using a CNC machine and finishing it with a stain can be a satisfying and rewarding experience. With the help of VCarve Pro software, creating a 3D model, generating toolpaths, and adding a base can be done quickly and easily. So, if you're interested in creating a beautiful and unique piece of art, give it a try!
Carving a 3D horse using a CNC machine and finishing it with a stain can be a great way to create a beautiful and unique piece of art. With the help of VCarve Pro software, importing a file from clipart and adding a base can be easily done.
Firstly, it's essential to have a good 3D model of the horse. There are many free and paid options available online that can be used. Once you have the file, you can import it into VCarve Pro software.
After importing the file, you can start editing it according to your requirements. The software provides various tools to make changes to the model. For example, you can resize it, add or remove details, and modify its shape.
Once you're happy with the model, you can generate the toolpath. A toolpath is a set of instructions that tell the CNC machine how to cut the material to create the 3D model. VCarve Pro provides an easy-to-use toolpath generator that lets you choose the cutting tools and speed for different parts of the model.
After generating the toolpath, you can start the CNC machine and load the material. The machine will start carving the horse according to the toolpath you've created. The carving process may take a few hours depending on the complexity of the model.
Once the carving is complete, it's time to apply the stain to the horse. Staining the horse can bring out the details and add depth to the model. Choose a color that complements the horse's design and use a brush to apply the stain evenly.
Finally, you can add a base to the horse to give it a stable and attractive display. You can use wood, metal, or any other material to create the base. Design it in a way that complements the horse's design and provides adequate support.
In conclusion, carving a 3D horse using a CNC machine and finishing it with a stain can be a satisfying and rewarding experience. With the help of VCarve Pro software, creating a 3D model, generating toolpaths, and adding a base can be done quickly and easily. So, if you're interested in creating a beautiful and unique piece of art, give it a try!
Christian Bergqvist
https://www.alberi.se/
Just wanted to let you guys know that some fonts when you download them, when you want to v-carve it can look like this. Now the customer approved this but take an extra look before carve.
The problem with this font is that when i tipped in smal letters ofcourse the first one big this is the result. I noticed the problem after the carve. So i tried to tippe in everything in big letters but some of them were big some small and some didn't matter if you tipped in big or small they come out big. Something is wrong with this font. Hopefully you understand what I mean
Just wanted to let you guys know that some fonts when you download them, when you want to v-carve it can look like this. Now the customer approved this but take an extra look before carve.
The problem with this font is that when i tipped in smal letters ofcourse the first one big this is the result. I noticed the problem after the carve. So i tried to tippe in everything in big letters but some of them were big some small and some didn't matter if you tipped in big or small they come out big. Something is wrong with this font. Hopefully you understand what I mean

Tony Duderewicz
Made this open book and put the Our Father prayer on it. Made out of maple. I used a .25 endmill for roughing and a .125 tapered ball nose for finish toolpath. the lettering I used a 30 deg v bit.
Made this open book and put the Our Father prayer on it. Made out of maple. I used a .25 endmill for roughing and a .125 tapered ball nose for finish toolpath. the lettering I used a 30 deg v bit.
RS
Robert Sandstrom
Created this cribbage board and donated to the San Diego Fine Woodworkers Association (SDFWA) a few months ago out of some donated Sycamore, Mahogany, and Walnut. Cribbage boards provide so many options for expressing creativity. The round base could possibly be made using vCarve Pro using moulding tool path but I used Aspire to model the gentle draft you can see from the side. Just thought it provided an interesting design profile vs. being flat. The ability to laser on the eagle flag was really awesome. Installed a camera on my Laguna EX laser and it allowed me to position very accurately to inscribe the saying on the flag.
Created this cribbage board and donated to the San Diego Fine Woodworkers Association (SDFWA) a few months ago out of some donated Sycamore, Mahogany, and Walnut. Cribbage boards provide so many options for expressing creativity. The round base could possibly be made using vCarve Pro using moulding tool path but I used Aspire to model the gentle draft you can see from the side. Just thought it provided an interesting design profile vs. being flat. The ability to laser on the eagle flag was really awesome. Installed a camera on my Laguna EX laser and it allowed me to position very accurately to inscribe the saying on the flag.
 Made by Testimonial